Clutch Spring Replacement
| Before I get started, I want to thank Williedog VROC #005 for the great how-to in the archives. What you see here is basically his how-to with a few of my own ideas mixed in to boot. Don't be put off by this repair, it's fairly simple to do with basic tools. I didn't take any pics of the side case itself, because it's so self-explanatory. Let's get started. |
| Make sure that when you get your new spring, you also get yourself a new side cover gasket. It may be possible to use the old one if it comes off fairly intact, but I always use a new one for applications that tend to take more than 5 minutes to get to the area that needs the gasket. If your old one comes out with a rip in only one or two places, you can use some red silicone gasket cement to repair & seal it. Note the fact that the side cover bolts are not very tight to begin with. I didn't even use a torque wrench when reassembling the side cover, and no leaks after 200+ miles. |
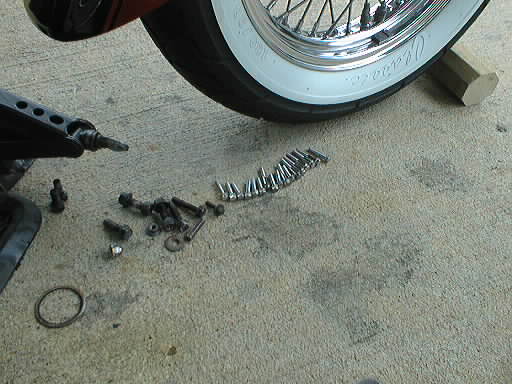
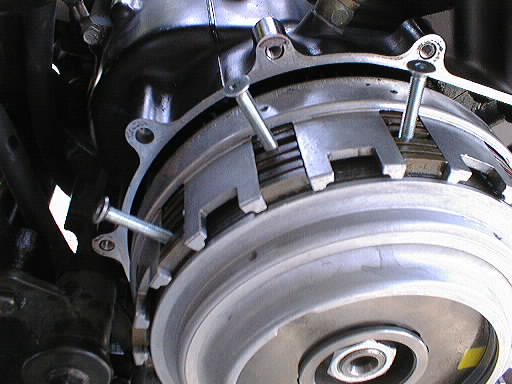
| First off, I decided to remove my exhaust system to make working a lot less cluttered. Depending on your setup, you may not have to, or may just need to remove the lower pipe. Remove the rear brake switch from it's housing, and cut the zip-strips holding the wires running up the frame tube. Using an 8mm socket, remove the chrome master cylinder cover, then the master cylinder itself. If you have a highway bar, you have to remove any mounting hardware that will get in the way of removing the right frame rail. After that, remove the two lower rear, and two upper front 7mm allen bolts holding the frame section in. The rear two are tapped into the frame rail, and only need to be unscrewed. The front two have 12mm nuts behind the frame which may, or may not require you to use a wrench to prevent their turning. Be careful as you remove the frame section, as the bottom right radiator mount is part of what you are removing. I didn't mess with the rear brake line, I simply rotated the entire frame section / floorboard /master cylinder assembly to the rear of the bike. The bolts holding the side cover on are 8mm. They are varying lengths, so assign one of them as #1 before you begin removing them, and lay them out so they go back in in the same order. When you have all the bolts out, you may have to "Lightly" tap on the tabs on the front & rear of the case to break it loose. Don't be heavy handed here. It took me a few minutes of tapping & wiggling the cover to get it to release. |
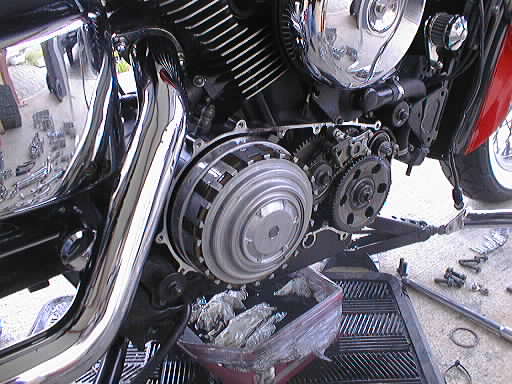
| Here's a pic with the front exhaust, frame section, and side cover removed. I had the bike on a center stand, with the oil drained. Williedog said he's also done this job with the bike on the kickstand & didn't drain the oil. Looks to me like it'd certainly be faster & less of a hassle doing it that way. Just be careful with nuts & bolts & such... there is a hole that goes down to the crankcase... |
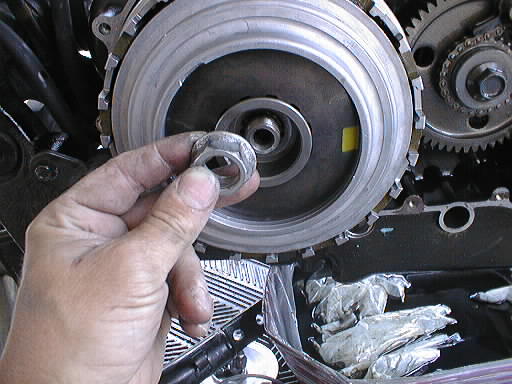
| This is the thrust washer that's probably going to fall out when you remove the side cover. Just make sure to put it back over that shaft before reassembly. |
Work a small screwdriver under the snap ring, and pull it out. It's not under any tension, so it's easy to get out. The groove it's in is filled with a "slurry" of motor oil & worn off metal from the worn clutch spring, and the aluminum housing. Clean all parts of the housing off before inserting the new spring. I used a can of brake cleaner which is safe for use on aluminum. Took 2 minutes & came out looking new. |
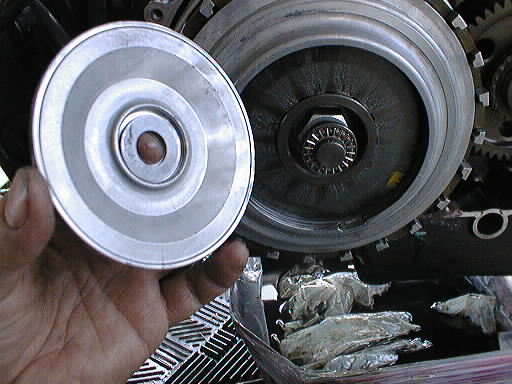
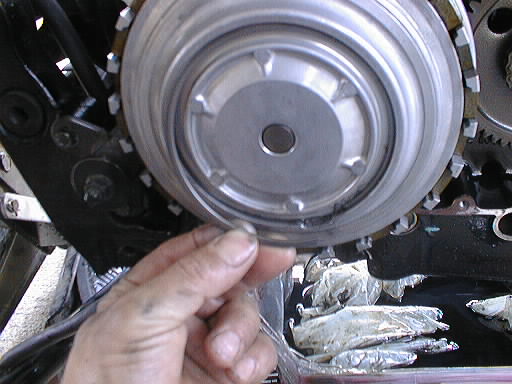
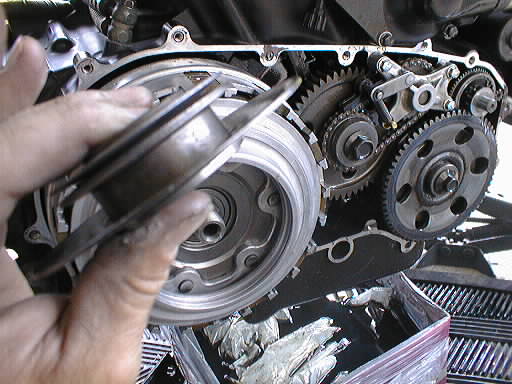
| Ok, here's the basket cover removed. Note the thrust washer inside the cover by my index finger, and the thrust bearing in the center of the old clutch spring. Remove the thrust bearing & set it aside. It isn't attached in any way, and should come out with no problems. |
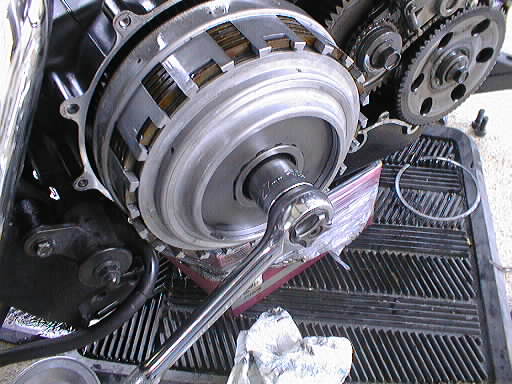
| If there's a fun part, this is it. Put your 27mm socket on your favorite taker-offer tool, and practice all the cuss words you know. Twice. The shaft turns independently of the basket for much of a revolution, and the rest of the basket cover turns independently of everything else. WillieD told me "A redneck can't work on anything without a hammer" so I broke out the trusty 2lb no-bounce and started-a-whackin 'er like a good-old-boy with 4 first names. (No offense meant to anyone named Billy-Joe-Ray-Bob or something similar :~) Well sir, it still wouldn't budge. Sooooooo........ |
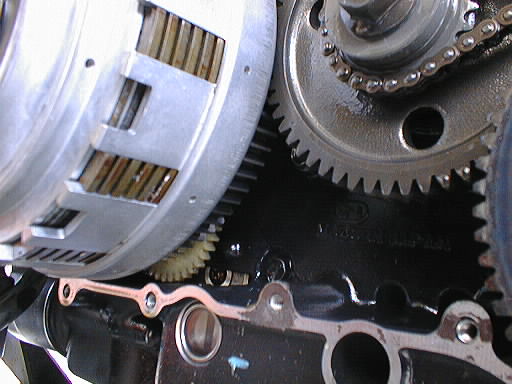
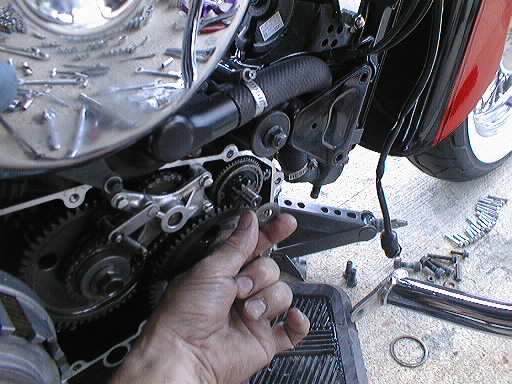
| Lookey here. Up where those gears mesh, I jammed a penny in while turning. The soft copper didn't harm the gears at all, and helped keep the shaft from turning. Note the plastic oil pump gear... no noticeable wear on the teeth. Also.. |
| I GENTLY pried some of the clutch plates apart, and put a bunch of these 5mm bolts between the plates. Be careful here, don't want to warp those plates. Think if I do this again, I'll use some wooden wedges or something less apt to damage the clutch plates. I ended up using about 7 or 8 bolts before it was tight enough to not spin. Then it only took 3 or 4 good whacks to loosen the bolt. Had I had my impact wrench, would have been MUCH easier. |
Here it is, 27mm of pain in the ass. |
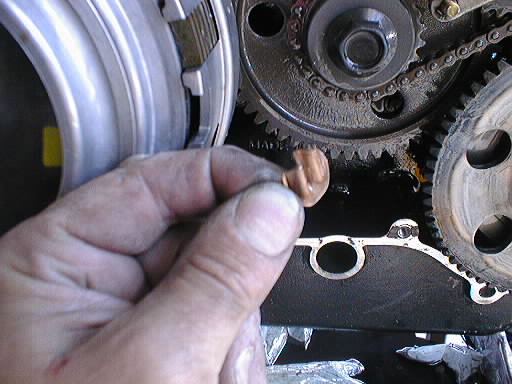
| Here's the penny after the new spring was in. Kind of concerned me, but couldn't see a single mark on the gear teeth, and no problems after I finished. |
| This is the center assembly with the old clutch spring on the bottom, two cupped "washers" facing each other, with a third facing away in the same direction as the clutch spring. Clean everything up, replace the clutch spring, and Replace them in the same direction. |
| Well, that's it for this how-to. Once you get to this point, you will realize how easy the job is. Reassembly is the exact opposite of disassembly. I tightened the case bolts in a circular pattern starting from the middle top, topped off the oil, and since it started to rain like mad, I waited till morning for a test ride. No slipping, no binding, just pure power! Notable that the first tankful took me 112 miles before reserve, which is about 10 miles more than previously. Clutch was probably slipping for a while before I even noticed it, losing power & robbing MPGs. Any question or comments shoot me an e-mail... oldsarge@hotmail.com Thanks again to Williedog for the original how-to! |
[Home] [Lobby] [Links] [VROC Home] [E-Mail]