Fuse Box Relocation
| Ever had to pull the seat to replace a fuse
anywhere beside the garage or driveway? If so, you'll appreciate this mod a whole
lot. If not, just imagine the cagers & other riders rolling past you as you
fumble to change a fuse with the tool bag laid out, the seat balancing on the passenger
seat, and sweat pouring down your forehead as you lamely try to salvage the pride,
thoroughly . Level: Beginner to Intermediate (Or whoever feels like it) Warnings: Gotta cut on the battery box, tool box, and fuse box. It's all one-way, so make sure you really want to do this one before starting. Time To Complete: How fast do you work? All day if you want to do a lot of clean-up, re-routing & general housekeeping under the tank. |
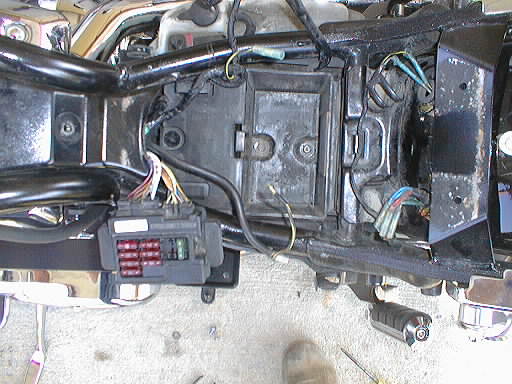
| Start by removing the fuel tank, side covers and battery. Here's a shot from above, showing the empty battery box, and the fuse box slid out of it's retainer. Remove the three bolts holding the battery box in, and the four bolts holding the tool box/side cover mount. The battery box will not come out yet... Read on. |
[
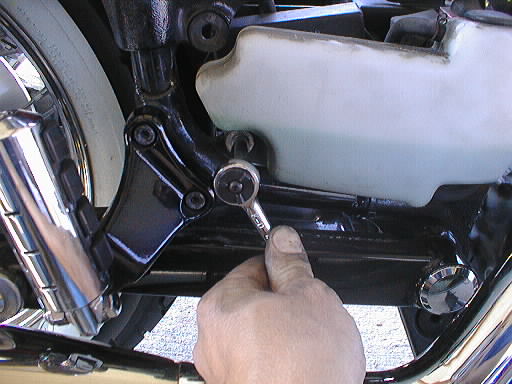
| Remove the two mounting bolts holding the coolant surge tank in place, and simply swing the tank out of the way for now. |
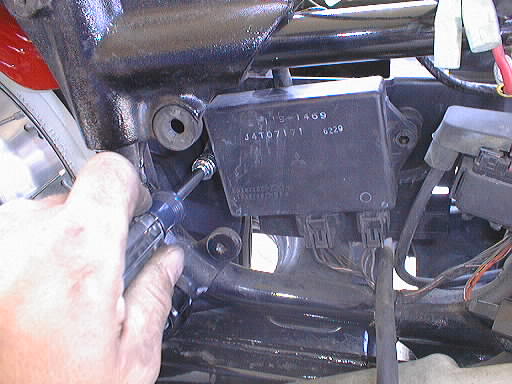
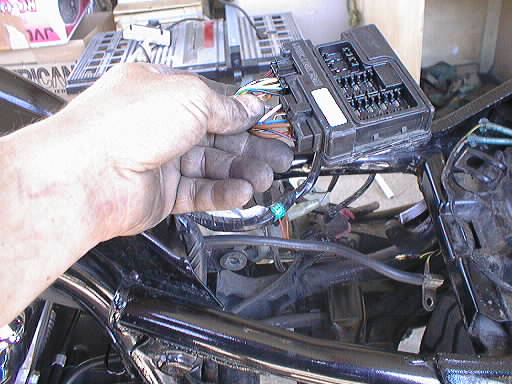
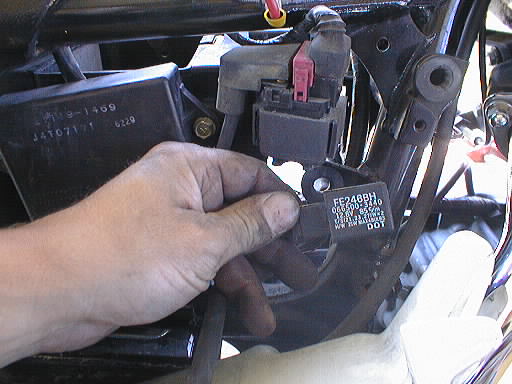
Now remove the ignition module that is mounted to the side of the battery box. |
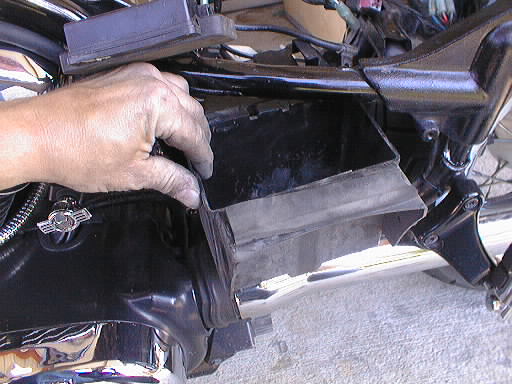
Now rotate the battery box and pull it out the side of the frame on the left side. |
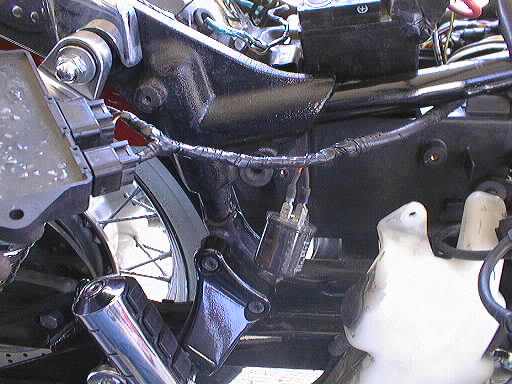
| Pinch the retainer here, and push it through the frame. This frees up the wiring harness so you can slide it rearward an inch or so to get the fuse box in the best position. I also took this opportunity to re-route the clutch hose between the frame instead of along the outside. |
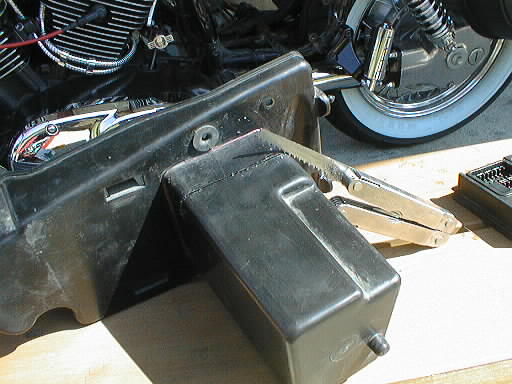
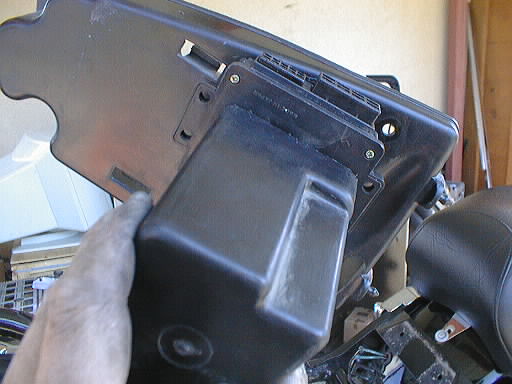
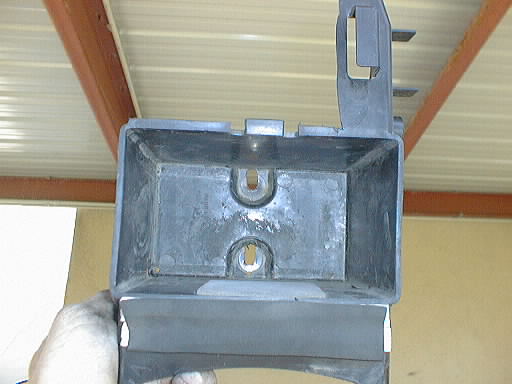
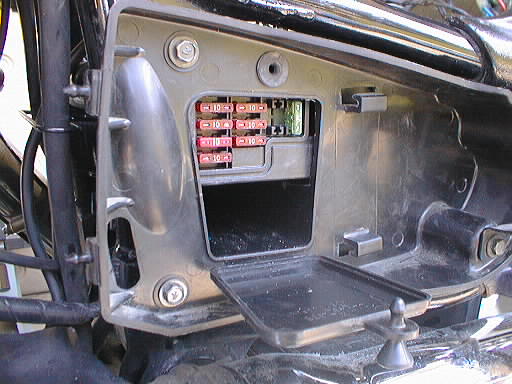
| Here's a shot of the fuse box with the retaining "ears" Dremeled off. This needs to be done to get the box in the correct position. If you cut them off even with the rest of the body, you won't cut the rubber o-ring that seals the bottom of the fuse box. |
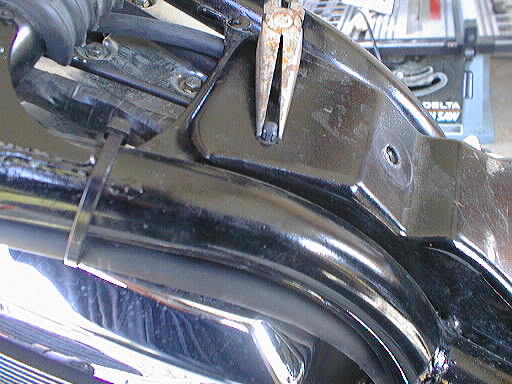
| Now for the high-tech part. Hold the fuse box against the back side of the side plate, and draw a line to get the line where you will need to cut. My tool of choice is the Leatherman Supertool with stainless steel saw. You won't be cutting the entire box off, just far enough to be able to access all the fuses from the front. Read on! |
Here's the initial cut ready for trimming and fitting. |
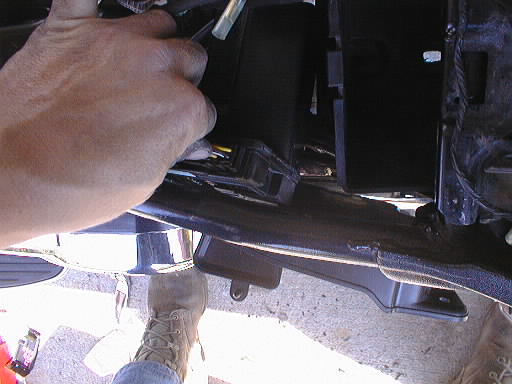
| The view from the rear as I began to fit the fuse box into position. This is when I figured out the retaining "Ears" had to go. Cest La Vie... Fire up the Dremel! |
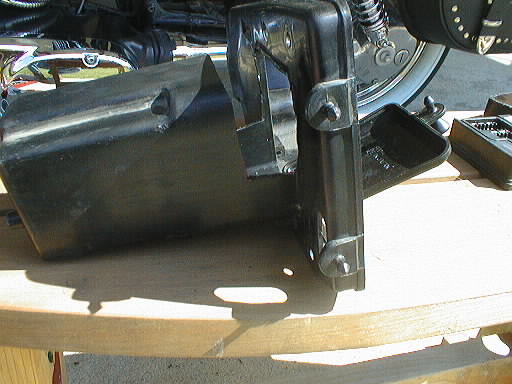
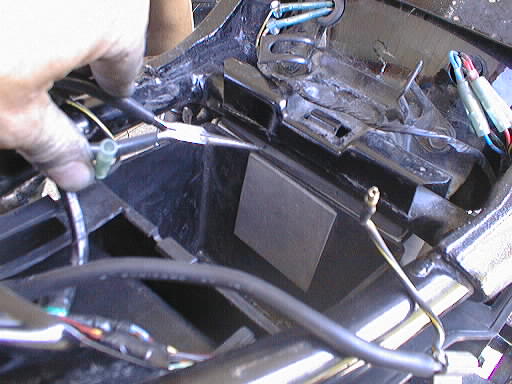
| Now you have to cut the battery box down so everything fits. I also elongated the mounting holes in the bottom of the battery box so it could be slid back and forth to get the best fit. With the front part gone, there's a lot more space under the seat for later modification madness! :~) |
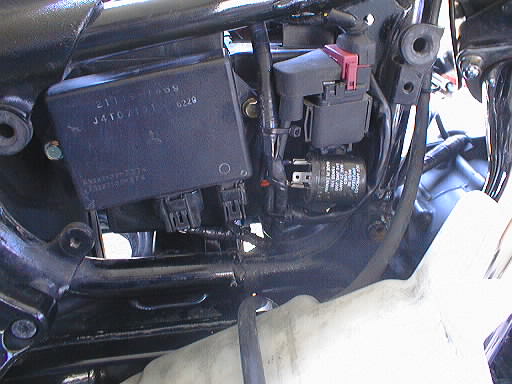
| Now you replace the battery box, and the tool/fuse box mount. Everything is loose at this point, and you simply ease the fuse box into the slot you cut. Secure with our old friend ShooGoo around the edges, and you have a mounting that is as water resistant as the original location, if not more. |
| When you replace the battery box, make sure the seal in the rear is making a good seal with the frame crossmember. The rear tire is right behind the battery box, so take heed wet weather riders...(Got that PNW-VROC?) I pulled mine off, put a strip of double-face auto trim tape on, and replaced the foam seal. It took a bit of persuading, but the seal is really weathertight. |
| Here's the finished product campers! Change those fuses & be on your way in nothing flat. Forget removing the seat & fumbling around between the wires. You don't totally lose use of the tool box either... I have spare fuses, a fuse tester, and assorted save-a-ride stuff in there. |
Wait! That's Not All!
| For all you turn-signal modifying and light adding animals out there I offer you this....... |
Here's the OEM flasher relay. Works OK. A bit wimpy if you add "more stuff". |
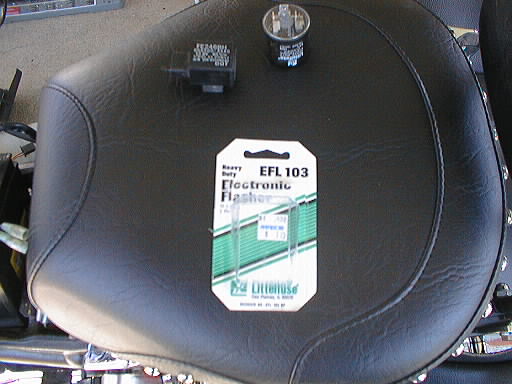
| Go out and get an EFL 103 electronic flasher made by Littlefuse. It handles 10 bulbs, and has all the electronical gizmos inside. As soon as I replaced mine, the signals seemed steadier and brighter than before. Gotta love those cager parts for something! |

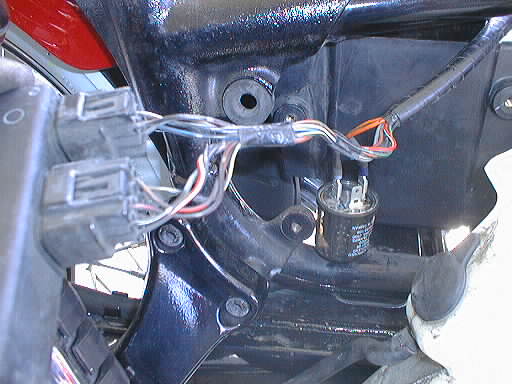
| Here's the flasher after I cut the OEM connectors, spliced new spade types on, and connected the new part. Thin orange wire goes to "L" thick orange wire goes to "X" Too easy! |
Here's the ugly before....... Exposed wires lookin' nasty! |
| And the purdy after! Take your time with this mod, and use it to clean up & re-route all the hoses & wires the Mama Kaw assembly lined in. |
| The after picture. Clean, Lean & ready to get mean! Now slap those side covers on & go riding! Or if your back hurt as bad as mine by the time I was done, go have a beer & chill! Hope you liked this mod. Feedback & input always welcome! ~Oldsarge~ |
Home] [Lobby] [Links] [VROC Home] [E-Mail]